All too often I get asked about crappy shifting of de-raileurs and what is their cause.
Most time it just boils down to cable tension. Pre-stretched cables or not loosening the bolt on the de-raileur that holds the cable, give it a tug and tighten it back every once in a while will help lessen shifting issues. Of course minor cable tension can always be adjusted by adjusting barrels at the shifter levers and in some rear de-raileurs but with a cable that has lost too much tension, it wouldn't work well.
Just about time too, after the last seriously muddy ride and 3 days worth of full stripping (the bike lah!) down for cleaning and overhaul, found the shifter housings worn down and totally rusted in a few rubbed areas that usually escape cursory inspection. As shifting was not an issue during my rides, I obviously have not gone through the cables millimeter by millimeter.
Anyway about time for a change, its been 14 mths of offroad riding on this set. Off to the shop for a set of Jagwires (Shimano drivetrain but Jag wires? Sorry, when it comes to cables, Shimano plain sucks).
Opening up the Dual Controls to get at the inner cables were a little different from the usual triggers but no biggie. Design and opening for the left and right were different, Got stumped for a minute but eventually worked it all out.
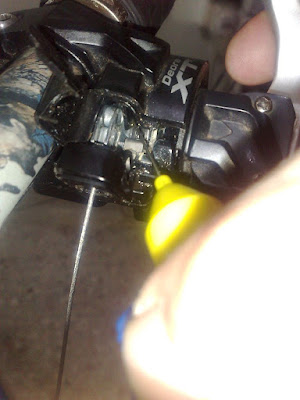
For the benefit of the 0.00001% of riders that use Shimano DCL (and that of course includes me) a pic and some description if u decide to DIY-maintenance or change up cables in these....
Picture, courtesy of my spare hoarded set , in case they don't produce it anymore in the near future, Oh yea, call me Paranoid.
Plastic plug screw conceals the opening on both shifters but the one for the right shifter is on the side and there are no other parts to lift up. To insert a new inner cable, click up all the way and thread through the "pinhole", therefore if cables are frayed or kinked, it will make it that much harder to get it out on the other side. The left one is front facing and a lid can be pushed up to expose the whole mechanism that catches the cable head.
Lots of grime has gotten inside and dried grease was visible all over but the covers were not totally removable so after lifting all the obvious screws and prying as much without breaking the covers, its a job for good old Q-tips to clean all the possible muck out.
With an overkill 900L light, I shined into the nether region of the shifters to get a good look. Always wondered but never really opened them up before to see how the mechanism works. Finally satisfied my curiosity
Before putting it back and since its all moving part, that means its another one of the hundred undiscovered uses for the best-do-it-all oil in the world, Ta Daaaa....the ZX1 micro oil. This stuff is simply amazing, it works so well , it would take a separate 10 page blog to list down all the things I have applied it to.
If there is one oil/lube gooey slippery stuff u need to stuff into your bag, take this one. Trust me on it. (Just dont apply to places where u don't want a screw thread to come lose, like the preload ring on a coil shock, yes it's that smoooooooooth that it will actualy cause the ring to move up and loosen as the coil start bumping against it on the trail.
Ok, enough digression........
Easiest way to measure and cut the new length of cable is to run it side by side with the old one.
Opening up the cut ends is something that my bitch of a cutter will always make me do. I seriously hate cutting cables! Anyway even if its a clean cut, having a small round file to even the ends out will ensure inner cables moves smoothly.
Next, inspection of the old inner shift cables says that all is good despite the crapped outer housing. So a careful removal of end caps to avoid fraying makes them reusable. The new ones that came in a set? Well there will always be another bike that needs a cable change soon I guess.
Anvil's Bike Maintenance 101: Anywhere and everywhere that needs to have their surface and orifice plugged with gooey slippery stuff gets a healthy dose of it.
An important part that I think has largely been missed in most bikes are the end caps. Once the cables are in, stuff it up with grease because the first sign of rust will always be the ends of the cables that has been exposed and shifting action tends to push the plastic layer back leaving even more exposed braided cables underneath. That's where all those grease inside the end caps help to keep things "un-rusted'. Likewise plug up the area on the tensioners once the cables are in.
A dollop of Parktool Polylube inside the barrel adjuster, to lubricate and to "seal"
Quick and Dirty Tuning.
Make sure ends of cable housing is fitted snugly into the shifter and cable stops (if not running full cable length).
Visually check and then give a few tugs before holding the wire tight and bolting the other end back into the de-raileurs.
For the rear if after tightening and shifting in the highest few gears keep skipping, release the tension a little. If it skips in the lower gears (bigger cogs), tighten up the tension again. These tensioning can be done via the tensioners on the shifters or the rear de-raileurs itself and should take no more than 3-4 quarter clicks clock or counter clockwise depending on whether to tighten or loosen. If more than that, release the cable from the de-raileur and adjust again from there as it means its too much for the built in barrel adjusters which are more for minor fine tuning. Apply what's said to the front, its
How to know whether to turn the barrel adjusters clock or counterclockwise, rather than mapping a picture with words and trying to orientate these little knobs can be confusing, the quick and dirty method is -- if you turn in one direction and it doesn't solve your problem but makes it worse, then turn back the same amount in reverse + another 1-4 clicks to see if problem is solved.


No comments:
Post a Comment