an(e)vil

My photo
Existentialism-- Just a bloody good excuse to go riding...
Showing posts with label Maintenance. Show all posts

Monday, July 28, 2014

The Brake Spring Trail...

Well it's not about another trail that has been discovered. With the tearing down everywhere for new development, fat chance of discovering anymore ride worthy areas.

How many people who used Shimano brakes experienced that notchy feeling in the servo wave cam and thought it was due to all the muck and grit thrown up during rides into the recesses of the levers? Lots of Q-tip and swiping at the roller and surrounding area followed by some lubing is the usual remedy...although chances are, the scratchy lever pull would soon return...


I knew from all the years that pushing the roller back in usually solves the issue briefly before it comes back and so far have attributed to the aforementioned "issues".  But the pair of XTR Trail levers here are lightly used. he roller hasn't even "dropped" for it to be able to be pushed  inwards...

Cleaning vigorously.. it will be fine for maybe a few lever pull before the sickening 'ticking" is felt again. The feeling is akin to crappy air shocks where you get that staggered feel as it moves through the travel.

Absentmindedly squeezing the front lever.. I look down and realize something was not right with the pads movement. Right side hardly moved. Pull it in towards the rotor and it moves freely, approximately equidistant to the left pad, during which in in those few squeezes, the lever was smooth. Then the pad stopped moving again and its back to the notchy feel in the lever... Weird.


Left: Off center spring right: bent back and centered
The misaligned spring was obvious but how it all leads up to the lever feel was not. However the fact that a one sided pad movement was somehow linked to the lever feel was all it takes to bend things back in place. (Though when movement is one sided, often it could signal more issues with the pistons being stuck, ).

Easy minor maintenance. Separately I have of course taken the brakes off and totally dismantled them and realigned the springs and clean out everything umpteen times which magically solves all the braking issue including those at the levers but never once thought how the two could be linked.


Out on a full ride today-- brakes working perfectly but damn I think my feeling about a vibrating fork lower at low speed braking is more than just the neurons swishing about in the head... more troubleshooting again.


Tuesday, May 6, 2014

Brake Pistons

Tutorials are a dime a dozen on the web these days. Normally I'm not inclined to paste direct links but this is one that eludes a lot of people working on their bikes.. Good read and good tips.

http://www.pinkbike.com/news/tech-spotlight-brake-caliper-piston-service-assessment-2014.html


Wrench On.


Sunday, January 19, 2014

XT M765 rear hub overhaul


All the mud and slush this monsoon has been pure fattie delights right up till last week's Green Corridor ride. Time to lift my procrastinating ass and pay the maintenance due now....

Needed sizes of cone wrench, 15 and 17mm

Of all places, finally found my cone wrenches needed to open up the XT hub at Daiso!
And that's where I got my magnetic trays awhile back plus a few other bike workshop bits. See...cheapo shopping at $2 Bucks Store does have its merit.

2 pieces included every size except a 15mm slot... but at least it wasn't hard to file down by sacrificing the 14mm from the smaller one.


Not sure how many ball bearings are on each side after taking out? Its 9 a piece and if yours are crushed are pitted-- get them at hardware shops. Size = 1/4" diameter.

Having been on mostly sealed cartridge bearing hubs for the better of the last 10 years, it took a bit of digging at the neural archive on how these hubs work... but exploded diagrams from the web is never more than a few keystrokes away. So fret not.

My rule of thumb? - Place everything in sequence. Last in first out and face-up each small bit in the direction they are removed. That way each piece that goes back in, the inner surface is always the way you set it down. Seems trivial until you pick up a piece look away and then back at it only to wonder if a recessed surface should be facing in or out.....

Remove bearings, axle + bits and clean everything out. For ease of  assembly afterwards and the unwinding for the next round of maintenance- degrease the axle to totally remove all grit.

Most freebody removal of sealed bearing hubs is simply a matter of pulling it off and catching any pawls and springs along the way. Takes a 10mm hex for Shimano hubs. Pawls and spring are further sealed away. Mostly clean and no gritty feel... not stripping freebody further.

Doubt this hub ever gotten open up before and the grease within looks kinda sparse. No problem just repack but not gonna reveal my super secret frictionless goo in use ;p

Same was done for the non drive side bearings

Aligning...
For the less adventurous, the method is only to remove the axle bits from the non drive-side (NDS). That ensures the drive-side end that goes into the dropout remains fixed and all you have to do is put everything back on the NDS and the axle alignment should not be off.

Still others advocate measuring the ends that stick out before removal so that you know where the end bolt should be on the axle on re-installing.

I thought about it-- what if  I just want to have everything out to be cleaned but don't have a Vernier caliper. Well I do but...
Use your frame dropouts as a guide. For vertical dropouts, turning the bike over would make life easier.

Just out of curiosity, I measured the axle length and also the end-end of the dropouts (which is about 4mm longer at 150mm). But final alignment is still best done with Eyeball-O-Meter as usual.
Screw in drive-side cone, align axle shaft into position within dropout..wind cone until it touches side of dropout. At this point take out the axle and slightly tighten with the 15 and 17mm cone wrenches. It's a little tricky doing it freehand. Clamp the NDS axle end between your knees. These are times when you really feel good having a vice of sort... no matter how dodgy a little thing it may be.

Back to the bike.... lube and put everything back in reverse order. Do not forget the two seals... if you have taken it off the freebody (part no. 11) and the NDS cone-shaped one (part no. 9). There is also the funny shaped washer (part no. 13) between the hub and freebody.

Yes it was Fix and Bake day...almost forgot. Tuna Puffs in the oven...


and while munching, giving it a good spin to see everything's revolving as they should be...


Thursday, December 19, 2013

Hope Pro 2 Evo Hub

Lashing rain these 2 evenings meant no chance of going out for a ride. Might as well pull apart and inspect the minor problem of some lateral play in the free-body of my rear Hope Pro 2 Evo hub.

Was checking just a couple nights back when that "cassette shake" was detected. Thought it was a loose lock ring or maybe needing a thin sliver of spacer as sometimes either a hub's free-body can be a tad longer or cassette height is a bit shorter. No biggie (if anyone ever need to do that-- hope you have those thin bb spacers that come with some cranks/chain guide components handy)

Apparently not.. the free-body was somehow able to push 1-2mm into the hub body.

Tried to tighten the bolt axle inwards-- seems to solve the problem..... for all of 2 minutes before putting the cassette back on. With the cassette in place, another couple of tugs and the same lateral play came right back!

Took out and do the tighten axle nut thing again. Oh F^#k me! This time the NDS bolt won't come out.. it just turn with the axle. Tried the press down other end with another hex key hoping to generate enough twist-- nah. doesn't work, unlike the CK fun-bolts.


Job for a strap wrench.. Only problem- that is another tool that got borrowed and was never returned to me.

Desperation .... stupidity starts to set in like trying to use a pair of pliers and hold the other end of axle tight...

Oh wait-- that's gonna score the bloody axle and screw things up. Thankfully before applying wrong tool and elbow grease for further FUBAR, just stopped in time to...

"Breathe... think.. think..."

Eureka!
Easy. Once the other side was locked onto the dropout.. the "seized" side unwind with just a slight turn with the 6mm hex.

Since its all out-- might as well just do some normal hub maintenance


The pesky component causing the play is right on the lower left of the box in the above pic. The drive side seal (part no. 3 in the exploded diagram from Hope).

It sits on a groove just behind the area housing the pawls and leaf springs. Once popped in, there's lots of wiggle room and its nothing more than a wobbly plasticky-rubbery type seal. No brass rigid plates or other parts to keep things stiff.

Popped in place... the seal's OD will fit into the outer periphery of the hub shell (as indicated above)... Pressing against it again -- I saw where the problem lies.. The whole shebang as the free-body is pressed inwards  makes the seal movement akin to that of  a toilet plunger!

Where the ID sits into the groove, its not a flush fit and with the flexy nature of the seal -- nothing is ever gonna sit nice and tight.  So that's where all the lateral play came from.

Sit the seal in properly pressed it as tight as possible all around  and the problem seem somewhat alleviated.Took a blunt punch and gently tap the middle of the seal as far in as possible while keeping pressure on the freebody making everything as play-free as possible.

Reinstall cassette and assemble wheel back on bike.... Almost zero play after a bit of moderate tugging. Will see after cranking the bike hard this weekend if the play comes back again...

At least the saving grace with this hub is all 4 bearings can be accessed without pressing them out to regrease.

Just want to add on as I know half the world is probably using Hope hubs and not to cause a pandemonium should somebody happen to read this... its not a major issue so far.

Though its a relatively new hub in terms of mileage and probably has this going on since day one but I have been torquing it the hardest compared to my other bikes as this was on the Lite-EG meant for speed, cranking at higher gears than normal when riding it. My rear short cage Saint has probably been doing a good job keeping the shiftings smooth even with all these going on. Don't have too much shifting related issues so far.

I thought a permanent solution might be to add an additional thin spacer beside the 2mm barrel spacer (part no. 11) which sits between the bearing on the free-body and the hub. Problem is I have no away to measure exactly how much the free play was.. Get that and machine a washer that is 0.1mm thinner would probably do the trick. Maybe somebody else can have a go at it.

Not gonna bother too much apart from periodic checking from now on but certainly won't be building with Hope hubs anytime soon (had other issues with Hope front 20mm TA and also the older Hope rears).

Pretty convinced now that hubs are one of those components where it pays to pay a little more.


Tuesday, September 11, 2012

its fork and f@^k

A new CSU spotting additional 10mm travel and a refined crown, some weird colored lowers with the fork's original 2010 cartridges. That's my rebuilt '2010' Vengeance HLR. 

Interesting?  But really this was a result of one woe after another in what was supposed to be a simple part replacement +  normal rebuild event. Well the bonus is I now have a somewhat "80% brand new" fork and learnt a few other things about fork maintenance.

Creaky CSU after 1+ yr of usage warrantied, no questions asked.

Stanchions not moving smooth after reinstalling-- initially thought it might be some vacuum... Troubleshooting the rebuild,  seems like the old lower's alignment is off. 

Yup its probably a little crude but free the uppers,  drop the axle and see if it goes through both legs of the lowers for the alignment check.

Apparently not and the fact that I could then twist it by hand until things align wasn't very reassuring.
Actually at that point I was mumbling to meself.. "Yea this is pretty much f^%ked". Leaves me wondering if the creak was really due to the fork uppers.....

Luckily somebody have spare lowers hanging around. Hell yea its good to have friends, save me more waiting time to order from the factory.. and this one probably meant to go with a  Specialized Status.

Well, here we go again.. *disassembly* >>> *assembly*  for probably the 50th bloody time within a week...

Yup, previously mentioned on how stiff and all the fork is ... so what could have happened?...  Given how the bike gets thrown when I bail plus a few really hard falls taken with the front bearing most of the brunt... I still say it is pretty strong after all my crash-test-dummy antics spanning from Singapore to Thailand in the past ~2 years. Wouldn't blame the design or manufacturer for the multiple bendosis state of the lowers.. 

Fate of the old lowers?...hmmm maybe some "light saber" stanchions in there and hang up in the bike room as functional art providing some extra lumens when wrenching.


Things noted...

The sealed cartridge damper can take between 70-85ml of fork fluid. Recommended factory oil change is 70-75 ml with 7.5wt oil. But last week Dirty had his paws all over the damper and put in 10wt filled to the max 85ml. The verdict now from compressing the fork is that its over damped and feeling rather progressive. That wouldnt be too much of a problem as intended build of bike would run great with a stiffer front.

But oil weight/ volume probably are affecting the rebound rate... too slow even when ramped to fastest setting. The reported squishing/cavitation as some users has mentioned is likely caused by the oil volume..if it isnt filled to the max then probably that's where it comes from as the damper rod is cycled.

Going by all things observed, less oil would probably means stroke action is likely more linear but starting stroke might need to add a little more low comp to offset. Ok all these just means more mucking around with the damper unit next time.

Frankly when the old oil was first poured, I didn't think it needed to be changed but of course one can't tell how much the oil would have degraded from just the eyeball-o-meter.


The fastest way to drop the number of max clicks ~15 of your hi-comp is to install the gold ano knob in reverse. Stupid me.. luckily no damage done to this rather delicate portion of the fork. Easily rectified once you realize what's the problem.

If some black plastic washer drops out along the way (~10mm diameter) seemingly out of nowhere -- fret not, check the 2 respective nuts (as pointed by red arrows in pic below) meant to tighten down and hold down each end of your fork.

In both, underside of the nuts has a  recess for this black spacer. Just press it back in. BTW a rebuild kit should come with these new spacers... these I think are meant to be replaced and seal the hole area on the bottom end of lowers to prevent fluids (~15-20ml) in the open bath from dripping out. My old ones looks ok -- so being cheap I'm saving the new ones for future rebuilds.

DON'T skim on the 15-20ml oil to be poured into the lowers. The fork is not going to work right without it (update on 4 Oct 2012)


Wednesday, May 23, 2012

Wrenching Therapy


Try fighting failing eyesight and achieve Zen-ness without cursing through a hot sweltering humid evening at the same time. And DON"T drop those fekking nano sized bearings cocked upon the equally tiny springs right under the rebound cap....

To be frank, the fork is way past what should have been regular servicing time and the last year plus hasn't exactly been rides on the pavements. Internally its still pretty uncontaminated.


As I'm getting a new CSU (Crown Steerer Unit) to replace this current creaky one fork is given a total dismembering. Damper cartridge left intact till oil change tomorrow.

Tools-- just size 13 and 28 (or was it a 30) socket wrench bits and hex keys and a pin wrench.

  • Remove red rebound dial... tiny screw holding it can get easily rounded
  • Uber careful not drop the 2 tiny springs and detent bearings for the rebound.
  • Remove compression knobs (blue and gold) from the damper tail end. Exercise care not to hit or dent this part, else you're pretty much f**ked.
  • Remove damper cartridge by pulling out from the TOP .. if its been left too long, lubricant might have more or less dried up and requires a bit of effort to pull out.
  • Purge air chamber fully before removing spring side air valve capping unit. Depress Schraeder valve, compress stanchions fully, press to release residual air. Repeat before putting a size 28 socket wrench to open up 
These are the points that you need to be aware of and exercise caution

Where is the step by step pictorial instructions??? Not tonight... sweating globs with the usual gunked up fingers, I'm not gonna muck around with the phone-cam every few secs. If you cant dismember without having a full pictorial laid out in front of you... no offense but this level of maintenance is probably not for you now... 

To be continued....


Saturday, March 17, 2012

EG: A Total Rebuild...

With the recent demise of my Podium pedals, along came an orchestra of squeaks on the bike. Loads of things have been neglected for a while... and it's taking forever this time to rebuild a bike... Can't seem to shake off the lethargy and procrastination...

Didn't look so bad from a glance... just lots of left over mud stain and couple of surface rust on bolts...
Pic taken to remember how cables are routed as I don't use much of the guides on the frame except for the rear brake.
Its a good idea to snap some "before" pics prior to a tear down. Especially if you don't run your parts like cables via the default routing. Everyone has their own little ways to make things work. You might think u can remember, afterall it was all your own DIY. Trust me... once u take them out-- the memories somehow gets synchronized to be erased from your brain at the same time....


Ok this I have to admit is a somewhat more neglected part than most on the bike.. Hidden behind chain guide and crank, the main pivot bolt wouldnt be something I would want to fiddle with on the usual. But 3 years with the last year a never ending onslaught of mud fest on most rides-- finally things have taken its toll as pics show.

TIP... if its extremely tight when removing a main pivot pin or bolts from rockers..make sure that they are being worked on from a neutral position. Top right pic-- with frame pressing on the ground trying to get the bolt out wasn't a good idea.. -- really tight as front and back is probably flexing while the bolt is being impinged in the middle. Found the best position by flipping frame over and holding rear tri with one hand and working out bolt with the other... whenever it feels tight, lift or lower the rear tri a little and feel things ease off... Not shown here but its the same with rocker bolts -- hold onto to rear tri so that the weight is not acting against the bolts as you get them out-- otherwise there could be some nasty surprise in store as i have learned by now... A repair stand is good for most work but not when taking apart hinged parts like frames.


[Edit] While play was detected in the main pivot, the 3 year old Horst links were still tight as day one. The alloy spacer (aka Pivot Pin??) was ok-- no excessive wear and when cleaned, light oiled and slotted with the new Igus bushing on both sides, all seems good to go. But it was really about time too as one of the bolts is just ever so slightly getting bent. Main pivot is a write-off though..from the way it was scraping the old bearings inside and the resultant dinks on it-- both this and the bearings are confirmed toasts.


After that it was a trip down to Dirty's place. Bearing tools arent something I can justify buying yet, especially if you have easy access to friends that have them ;p

And I was right-- the 4 x 6802 bearings were completely totalled. One actually disintegrated on its way out as seen above. Back home it was time to take a look at the rocker bearings which being just changed a few months back, only needed some grease stuffed in.


Rear Shock cleaned up, piggy resevoir topped back up to my psi setting, bb bearing checked and regrease... time to put things back. Followed by some decals doubled over with window films on the usual cable rub spots.


Still, it doesnt look like its gonna be finished anytime soon. Decided I'm done with those shifter cable guides I never used. Drilled them out for full cable housing to go thru instead of bunching all to the brake cable like before.

... Almost forgotten. My new fork! Ok... same old routine "measure 10 times, mark, tape, locked down with el cheapo homemade "saw'guide".... Damn! Need a new saw blade... arrghhh got to wait till tomorrow again.

And its a bad bad idea.. never strip more than one bike down. Not ever in a small confined cell. Much less 4 bikes! What the hell was I thinking of...


Fast forward to a...Lazy Sunday.

Paranoia says to measure another 10 more times even though everything was marked up the night before... Steerer cut, headset cleaned and bearings repacked. Front porked up by half a pound over the old fork...

Cable Management

Often one of the most visibly neglected parts on many bikes or simply suffer from poor bike building. That is cable lengths are incorrect. Many a times simply following the default cable routing on the guides on the frames without further thought if things makes sense. I have pretty much troubleshooted the various issues and modded before albeit not often the best looking. Decide to get these done properly once and for all.

Sick and tired of chafed housing? Its a nuisance especially with full sussers.. Double up the protection where the usual spots will occur. Snipped off old plastic cable ferrules and antiquated v-brakes noodles are great to have. Found more usage of bits that most would have junked out from their tool boxes a long time ago...


No as if I'm in any hurry... decide to apply my usual dose of el cheapo DIY. Decaling that doubles up as frame protection and cabling aesthetics instead relying on old mangy velcro from before...


If there is anything "wrong" with the EG it has to be the cable guides on the headtube. Pretty ridiculous to bunch it up front running long bars. To leave enough cables for the bar to turn a 180 degrees during a crash would loop the cables way too forward. FUGLY.  Even then it tends to pull the cable, stretching it. Thus apart from licking your wound mid trail you will have to get down and fiddle with the bike to get it to shift properly to get you home.
Some has argued that not using the provided guides will result in cables getting hooked on the top of the fork. Now that's just cables being too long and not secured at the right places beneath the top tubes. Tagging cables that run together is always a good idea as it reduces the messy look. Otherwise let them run parallel where possible (see left shifter and rear brake hose). Apart from aesthetics there is also a functional side. On night rides, one of the thing robbing precious lumens and casting funny shadows from your front light would be cables. One of the thing I really dislike about most lights is that they are mounted above the bar and off-centered. Something I just cannot agree with visually. Much prefer something central and in front of the stem... something that can be done with cables out of the way now and my DIY lighting mount...

And finally triple-film wraps on stays instead of the usual bulky protector and inner tube wraps for both aesthetics and functionality... these window films are some tough little mothers.. Made some triple layer with a thin decal sheet in the middle. Always wanted more black on the rear tri and Titus never seem to make a rear black triangle for the EG.

Reborn. The "EL Getsugatensho"  theme.. for the Bleach anime lovers, you'll know what I mean.


Monday, January 16, 2012

Lubing Chains

One long term review on BikeRumor I had been following with interest is the 9 vs 10 speed system... and I wanted to ask if all the test riders started out on the same footing...thinking that those who had not degreased their new chain prior to putting it on would be seeing more wear. Now I'm beginning to have doubts. No, not about the 9 or 10 speed chains but my whole possibly wrong ideas for the last few years.

When knowledge accumulates and we think we know better, it gets really hard to put off what we have "learned" as something that has been wrong. But on reading THIS, I concur with on many of the things said, after being able to shake off a lot of my preconceived "learned" ideas. Gonna go back and do what I used to do with the next new chain. Leave it with the factory grease intact and see how long it will last.

What happened
Something about bicycle chains has been bugging me for the last 2.5 years.. They seemed to be stretched way before their lifespan is due on my 9 spd drivetrains. I was averaging 6-9 months on one chain that while not religiously cleaned but are subjected to at least a total degreasing with solvent 2 months on average. Mileage are mostly weekend ridings... something is very wrong somewhere

I attribute that to


  • Change of brand (previously only use XT and XTR and KMC chains) to SRAM 971 chains which I find shifts better than Shimano or KMC thinking that it was due to the slightly thinner SRAM width and hence it stretch faster
  •  
  • Pulling a heavy bike AM bike, hence chains stretch faster, previously most of my bikes were relatively light XC rigs

  • Repeated chain growth from rear suspension (in earlier days, all my XC bikes were hardtails)

In the past a new chain was never degreased before putting on. Then I somehow found out about the great debate on whether to leave or remove the factory grease from a new chain. Decided to follow the "removal" camp which coincided with the switch to SRAM chains. That's where my woes began....

This was coupled to the fact that with a factory grease-removed chain... the initial usage leave it much cleaner, leading to the perception of being "better". Other than the reduced lifespan, another problem that crop up was rust... especially after repeated washing after every ride during the rainy season. That was hardly ever a problem in the past even if I don't relube the chain after hosing down. The only downside of chains back then is that it sure leaves a lot more gunk really fast around the jockey wheels and cogs. Ok that is probably one of the reason why I religiously degrease new chains....

Like in the article link, I realized that chains felt a lot looser after degreasing and repeated degreasing and there were a couple of chains taken off when bikes were dismantled which i wanted to re-use. Within a year 2 of them which had the factory grease removed were so seriously seized and kinked up in a rigor mortis state that they just had to be thrown out.. There are some old chains that were left in my storage which did not have the factory grease removed and much dirtier when taken off but still perfectly alright.


With the mindset deeply entrenched that a degrease new chain is better, it just never occurred to think  back to the past experiences  like the XTR chain on my old Cannondale F3000 that lasted 3000km and it was not even worn to the point that a new chain was needed. Just that I sold the bike and never got to find out how long more it lasted the new owner....

It became a vicious circle of cleaning and not questioning when chains lasted a mere fraction of what they used to. Rather I keep finding "reasons" like those attributed to above.... and blame it on everything else.

If I had chanced upon the late Sheldon Brown's article poking fun at religious chain cleaning fanatics, that might have given me a clue not to embark on my "new" found way of maintenance then. On a more serious note there is a separate article from him as well as one of the biggest chain manufacturer in the world, KMC, that explicitly said not to remove the factory grease on new chains in this article here

One of the chief argument that got me to remove the grease from a new chain is that the thick grease will trap all sorts of sand and grit which is what will wear out the chain fast! No doubt with the thicker grease in there.. this buildup is fast but now thinking back to each time I degrease a chain, new or used, it doesn't take very long before it is also trapping all the nitty gritty trail stuff, but just that now there is a lot less grease on the pins and rollers which means its actually wearing down a lot faster!!!

This is like enlightenment all of a sudden! I just snap out of it and while its probably too late to save the existing chain... let's see how the next will hold up. If it lasts at least a year or cover 2-3 times over my present mileage on chains used in the last couple of years...I'll be cussing at all the $$$ wasted during these time for no good reason on chains that need not be changed and solvents that need not been bought.


Sunday, September 18, 2011

Ceramic Bearings

Bearings. Ceramic vs steel, its one of those epic never ending argument which is better or is ceramic really worth the moolah one doles out. I personally find that there is too much marketing hype surrounding ceramics. Sure, from all the testing and data, it all points to ceramic being more superior. But what is that relevance in the context of your average rider or in fact for cycling in the first place? The only thing I could think of that benefits me is that the balls wont rust like steel ones should maintenance and repacking of grease is neglected. As to smoothness and the spinning, that to me is just one big myth. Whatever minute friction co-efficient that is lower in ceramic is mostly knocked off after grease is packed and seals are snapped shut on the bearing. Those 2 accounts for most of the "unsmooth" action of a bottom bracket that riders feel.

Having said, all of these is pretty much theorized from my bias of just extensive reading and experience with steel bearings. Too cheap to fork out for a ceramic, I had to wait till someone throws out one for meto take a better look and salvage if possible.

Gotta love Facebook...u just get to know people from all over and get to put my greasyt paws on their "throw-away" items. Of course central to this whole article was an Aerozine Ceramic BB using 6805 2RS bearings.


Like its steel counterpart, if any side were to go wrong I would put a bet its the non drive side. Sure enuf after cleaning up the outside and with outer seals pried, its surface rust on the external of the left cup. No biggie, this alone shouldn't cause a problem unless the insides are rusted too.

Open up and the problem?? .... the original stock grease. Now I have known from stripping bearings over the years, packing enough grease in bearing is something of a hit and miss. A lot of manufacturers don't put enough. This probably has something to do with the smoothness but more on that later. The problem is if the bearings with lesser greease arent being maintained often, the balls will wear out fast and gets pitted. The case here is not that there is insufficient grease. On the contrary there is quite a lot but looks pretty dried up. Not too sure if ceramic ball specific grease are meant to be like this. If it is then another myth of ceramic bearings being smoother are busted. The more viscous a lube/grease, the less free spinning the balls will be, hence it means more effort needed to keep things turning.

So the logic is to degrease, use a light oil and if possible remove the rubber seal to minimize friction and or simply to increase thefree movement of the whole bearings? Yes it works but it is a trade-off with having more frequent maintenance. If a bearing is tweaked to such a state and happen to get into water, then there is no protection and likely to be junked in a short time if not cleaned up in time. The other con to it is the noise... when it is not packed, the sound coming off from the balls contacting the race is noticeably louder and rougher. This is often mistaken by folks that there is something wrong with their bearings" Nope its not. A seized bearing or one where it is work down until you can feel some lateral play when wiggling a finger inside the bearing hole side to side, now that is time to change a new one.

Of course prolonged usage without packing enough grease is gonna result in bearings having all kind of play and rolling around the race especially those with lesser tolerance. That is certainly gonna affect bearing life as well. So at the end of the day for me it still boils down to packing it up but the "secret" lies in the choice of grease. Keyword: Viscosity
But remember not all grease are ok even if the viscosity is right... Make sure they do not contain stuff that will crap out the seals or in some cases the plastic retainers found in certain sealed bearings

Just to show the difference between a greased and lightly oiled bearing with seals removed...

Wednesday, August 31, 2011

Bike Shop Horrors Blog Articles..

Was just catching up looking through some blogs I follow and two article in a row has something in common. Horror stories of bike parts mauling and slop jobs done on bike. The first with switching brake for cable housing would be like walking into a 7-11 for a pack of condom and only realize later back home it actually contains sausage skins instead of latex. When you walk back the cashier can actually tell you "Same same can use one...just a casing only mah!" I really hope the mech that did that came from some old school "experience" where such swapping (not advised but) can sort of work back in the days of 5-6 speed cassettes and friction shifters and not out of convenience because the shop was out of shifter cables.

Yes, having been around long enough, I do remember there was a time where so long as a bike can move, its good enough. Singapore has come a long way in the last 30 years but there are still some that are left behind doing things the same way they did years ago. Wouldn't say its a waste of time, there's a whole pool of tips and tricks especially when it comes to doing up older bikes that can be learned. But with newer bikes, its better to wave a hello and move on to some other places for fixing things up.

The second horrror story on the Cannondale lefty, even just reading made me go "WTF!"
Had actually witness something similar years ago in a local bike shop seeing how some Chris King headset was being knocked out with a screwdriver and mallet. The bloody thing fell out off with a loud ping on the ground. The repair stand actually toppled and I was near enough to stretch out and catch the whole stand + bike contraption....wonder where the owner was then! 

The owner/mech nonchalantly remarked to me as if nothing has happened as I put the stand back upright, "Oh CK headsets are frigging tough". The look I gave him was one of disbelief at his attitude but he must have mistaken it for not believing what he just said and dropped the lower cups and bearings onto the ground to prove his point. Well to keep it short, paid for what I went to the shop for and was out in 45 secs.. Never ever went back there again, even if their inner tubes were a couple of bucks cheaper than anywhere else.

Glad I took the plunge to venture into bike maintenance and on those occasions where special tools or simply tools I dont have are needed, I only go back to trusted bike shops.

Thursday, July 7, 2011

Broken Bolts

Guess no matter how much caution is exercised.. some things will break after awhile.

Always dread the popping sound whenever removing the alu bolts from the bike's rocker. That hollow alu-alu release fills up the whole room with a resounding *crack* when each one is loosen even though its never over torqued. Was just thinking how long before the original ones will hold... luckily gotten some spares recently.

Decided to change out the old worn bearings and finally tonight 2 of the 4 alu bolts that came on the EG gave way. Nightmare... was prepping the bike for next week's trip to Penang. WTF!

Ok settled the new bearings first while thinking what to do next...

Drill it out like stuck bolts of SPD cleats?
More careful drilling and slowly increase bit size and hope it s thin enuf to be loose an finger the remaining bits out?
Buy a reverse tap tomorrow and then go about it...

Nah... things like that just irks me... Ok who else to call but John and we just went thru the scenarios of how badly each of the above I can screw up and his experience dealing with such things in the shop.

Drill's battery fully charged....ok so its a do or die moment...
Checking the bolts that came out-- the material seems pretty soft and the drilling method might work... I have one shot with one of them-- the one that broke off on the screwthreads on the rear triangle. The other had 2 positions and in the worst case scenario I could use the other position for the rocker pemanently.

As I was drilling.. struck me that since rounded hex bolts can be removed by jamming a bigger torx key-- if i drill small and deep enough--that might work. Provided the threads parts were not seized tight. Doesnt seem to be as I detect just that wee bit of wiggling when nudging a blunt punch in the hole i just drilled.

Ok long story short, 1hr of cold sweat, 2 cups of my favourite Jasmine Tea and 50 F-words later-- the hex key method worked. Luckily!

Repeated with the other broken piece and refined the torx key method using a mini screwdriver instead. Even easier this time around....

Whew... no need to cannibalize my spare EG for next week..........


From top left: (1) How much bushing wear from 2 years of riding, used ones sandwiched between new bushing stack.  (2) Damnit! Drill damnit drill.

Bottom left: (3)..nice and easy, now come out baby...slooooowly
(4) Stuck and unstuck again! Hmmm and how did 2 of the bearing seals get a similar kind and size of crushing? Bushing wear causing play and compressed over time?

Saturday, May 14, 2011

Wasabi-Mayo Bearing Grease and the iMobile Tool Table [ >:}} Decepticon iNspired]

Now that GE2011 fever is over... guess its time to get back to bike related scribbling...but this piece is really mundane maintenance stuff cos I have nothing better to write.

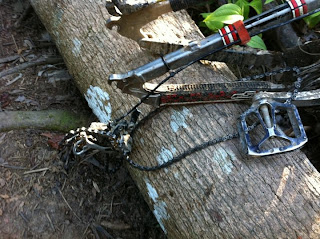
Fixing a broken hanger last Sun on what's probably the first "dry" ride of 2011 after an unusually long wet and gunky season, to my amazement, parts were actually still movable while "camouflaged" and  looking more like the trail its ridden on.. A continuous evolutionary process of  cumulative dried mud and grease that no amount of hosing down after each ride ever quite got rid of.

Under that oxygen deprived state in blistering 34 degrees C heat, there I was, contemplating if the chimera looking mud + grease could in fact be some sort of symbiotic inorganic lifeforms thriving on a highly concentrated salty liquid media, like the perspiration yours truly was dripping onto it.

Ok, ok maybe it wasnt moving bike parts... but that glob of greasy mud exhibiting amoeba-like movements. I swear the heat hasn't caused a neural melt-down.  Its aliens right in our backyard attracted to persistent mud loving mountain bikers that resist all effort to be kept out of the trails.

But a Nobel prize for the discovery of the century can wait... Yes, its about time for a major cleanup and overhaul on the EG, be it undiscovered species or dying digested bike parts playing host to these parasitic lifeforms.


The never ending mudfest was just a poor excuse to let things rot. In reality if the gunk is truly alive, I will hypothesize further there must exist some unseen wormhole in the house.

Stuffs forever disappear when needed, freshly dismembered parts from the bike gets mysteriously telported into another dimension. No, its not bike specific, happens everytime any wrenching is done.

Or is it like that episode of Twilight Zone with little blue men running around making everything disappear and then magically reappear a few days later...


iMobile Tool Table
(Disclaimer: the "i" in front of "Mobile" has nothing whatsoever to do to with an iPhone or iPad ...it simply stands for " i{came up with this dumb idea of a}Mobile Tool Table).

Moving from a pathetic tool box with contents hardly worth a second look, the obsession grew into a purpose built floor-to-ceiling cabinet for tools and bike paraphernalia. It even branched into what some friends termed as a obsessive compulsive fetish for lubes (...though I would certainly take more kindly to parallels drawn to my days as a Bio student, advancing into areas like genomic comparison across species of Calmodulin). Both aspects are similar in a way-- ie. who apart from me actually gives a flying elephant's damn!

And then came more parts, thus more space were permanently designated as "Bikes Only" restricted area around the house with 5S efficiency of Seiri, Seiton, Seiso, Seiketsu, Shitsuke (if anyone is interested, it translates to Classification, Organization, Cleanliness, Maintenance, Discipline). I dont know how that translates to efficiency cos the bloody tools are still missing when needed!!!

Over countless sessions of bad coffee and bike talks with the Dirty-Tiny gang, everyone was telling me to do it like what good LBS does... wall 'em all up, biggest to smallest wrench all in a row yadda yadda.. Nah. Only problem is that the Art of Apartment Living aka Pigeon Hole Shafting in Singapore means all the usable walls are already plastered with gigantic LED TVs, my favorite tattoopaintings and what not... So I was still sucking thumbs and greasy chips where time spent on bike was errr.. transformed into watching another round of Transformer 2 on one of the said big ass TV....


...when suddenly an idea hit! Faster than Optimus Prime can change into some dumb truck without getting first into a telephone booth (hey who needs one! we all got iPhone these days, no?) I retrieve a much hated piece of furniture by the wife---- an about to be thrown out TV table for an era of cathode ray picture boxes long gone, sitting around forlornly for years in the storeroom.

With lightning speed and boxes of tools already labelled into "Frequent Bike-Specific Use", "General Usage" and "Occasional" the devious transofrming speed would outstrip any Decepticon's slick moves--- all in record time before the wife can list down her 10 000 reasons why it should be thrown out.

No doubt, more modding would be added soon; with an organized section to lay out the components and small bits taken off a bike thus ensuring it has its own invinsible force shield to prevent those wormhole teleportations.


A little planning would probably see the sides and rear transformed with hooks to put up more commonly used tools.

All neatly covered up when not in use would pass as a coffee table with a nice little piece of cloth thrown over that even the wife wont notice. tA dA--- THE iMobile Tool Table...   dEcePtIcOn.Inspired.


For now its good enough-- rolling from left to right depending on which part of the bike I'm working on, so far been two blissful evenings of no missing tools or parts...

Minus the usual cursing and time wasted searching high and low, it means more effort could be channelled to picking apart every little thing short of a heart transplant type surgery like pulling the new fork apart.


The Wasabi-Mayo Bearing Grease Concoction
Choking bearing full of new grease is no surprise fetish to all that knows me well enough... Recently obtained some "hush hush" grade supposedly super duper grease from an unnamed friend working in some hush hush no address place on hush hush "I-have-to-kill-you-if-I-have-to-tell-you" equipment. Was all excited if the holy grail of grease that will make a steel bearing rival that of ceramic smoothness was finally found.

First look and no doubt its some quality grease but I was not too certain if its the best for bearing, given its dry pasty texture that was more like some cementing putty. Had to rub it on the back of the hand like ladies testing out the latest cosmetics t oascertain what kind of greasy quality it possess.

Conclusion: Good for smooth surfaces (eg for application between seat tube and seat post) and would be relatively waterproof but too "stiff" for bearing application where the bulk of it would be spinned out to the sides leaving the balls with little lubrication as the bearings move.

Greasy alchemy time.....


Breaking out the trusted Dura-Ace bearing grease with its decidedly radiocative looking fluorescent green hue...I wonder what the end result would be like....

Wasabi Mayo!!! with a texture to match like the real thing... if anyone still has doubt, please head down to your nearest supermarket for a bottle of Kraft mayonnaise and those plastic tubed wasabi to  experiment.... not recommended for bearings but shouldn't go to waste if you can find a spare guppy or two in your aquarium tank though.


Next up, application to rocker bearings  followed by those in the bb. Couple of things I learned about bearings through trial and error: 
(1) Most "rough" bearings can be salvaged and reconditioned unless the balls have already been severely  worn down with excessive gaps to the race thus causing lateral play.

(2) testing out any new bearing grease on old bearings-- if they don't work, you pretty much now after awhile as that would cost you new bearings as bearing play is detected (usually with some accompanying squeak) and you know its time to thin down the wallet a bit.

Ok time to finish up putting back everything in place and be ready for this weekend worth of pedaling...

On the first day he strip...
On the second day he cleaned...
On the third day he rebuild...
...
...
On the 7th Day he rides...


Update: The Wasabi-Mayo goo seems to be holding up good. Bearings were really noisy before they got smothered..(usually if bearings are goners...any new greasing will only make them last 1-2 rides worth before play and squeaks reappear, had seen quite a bit of mileage since and so it looks like my 2yr old sealed bearings will be able to take more hammering before breaking out the spare $40 Enduro replacement).

Sunday, August 29, 2010

Review: Cane Creek XXc Flush II Headset -- Part II

Part 2 of the long term test of the earlier Cane Creek XXc Flush II Headset review

Everything was working fine with no hints of creaks or groans despite the repeated hosing down of the bike after muddy rides. I had not peeked into the headset or bearings since it was installed a year and a half ago. With the fork going out for a servicing, it was about time to take a look at how much havoc I have heaped on it.

First thing out were the bearings and they came out easy. No pinching in the cups. No rusting. Inspection of the outer periphery on the bearings and the inside of the cups shows no abnormal wear (indication of a headset that hasn't been misaligned during installation). The crown race sits into the bearing in the lower cup and is normal to expect some grit and contamination to find its way between the bearing and inner surface of cup as it is not fully covered by the smallish crown race. Was expecting at the very least enough contamination that is sufficient to leave some fine scratches on the metal surface. However little was detected.

The crown race itself that has gone out with the fork was new. Despite being small and thin, there were no signs of any denting (and I have taken more than a few hard hits on landing badly during jumps and all). This was one area I had concerns when first installing the headset but guess now over time it has proved itself not to be an issue.


Rubber cover of seal in lower bearing slightly pitted...probably a result of chemical reaction with salt and water over time. But nothing to worry about.


Upper edge of the lower cup where the bevel edge of the bearing sits is a little rough. To be expected as that would be the repeated impact point time after time as the front end of the bike is pushed downwards. But nothing overly worn and everything was repacked with lots of grease to make the area well lubricated and slick.


Bearing had no play or roughness but just for the sake of checking, the seals were popped revealing bearings and race that are still in rather new looking condition. Shiny balls from eye balling is an indication of little or no pittings. Not gonna break out a microscope to check :).

Just a cleaning and repacking with new bearing grease after this.


Top assembly. Again checking all around for wear and tear, the surface where spacer sits was hardly scratched. all fine prints and decaling originally on headset are still readable

The entire top assembly was even cleaner then the lower cup. Surprising the 1.5 year old grease inside was rather fresh looking.


Picture shows how things look when the top was just taken apart,


The dark blue anodized compression ring was just as new looking. Looks to be well protected by the metal seal (middle of pic on the left) that sits above it. Again no signs of significant wear from scratches as otherwise that would have shown through easily in the anodizing.


Repacked and good to go together with a freshly serviced fork with new dust wiper seals.


Not cheap but certainly a very impressive reducer cup headset and definitely a good investment. With a recessed crown race, it makes this one of the lowest if not the lowest "zero-stack" in the market with only ~10mm total stacking, 5mm top and 5mm at the bottom....there really isnt that many especially if like me,  you are looking to lower the front end as much as possible on your bike. Abuse over time has shown this headset stands up to the task of hard riding.

I started off with another rather popular brand of head set in mountain biking but now I'm completely sold on Cane Creek stuff.